


(as always, click on the photos for much larger views)

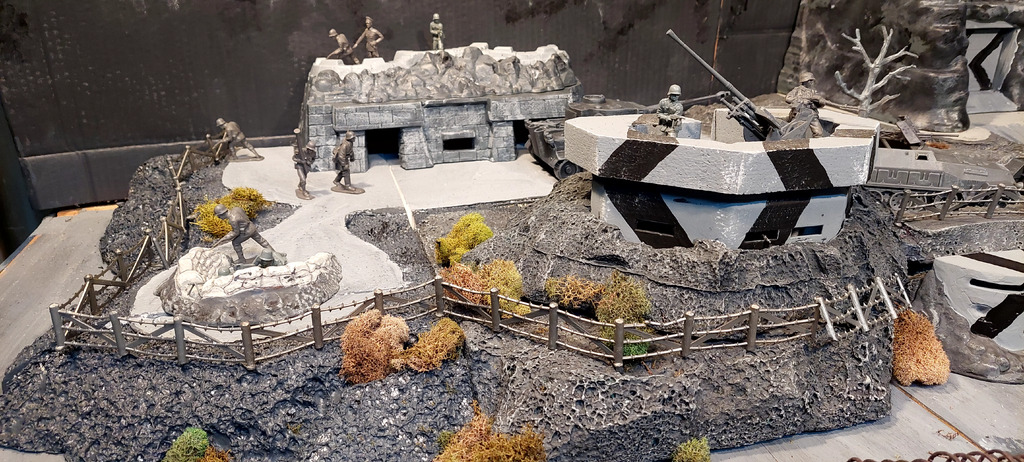
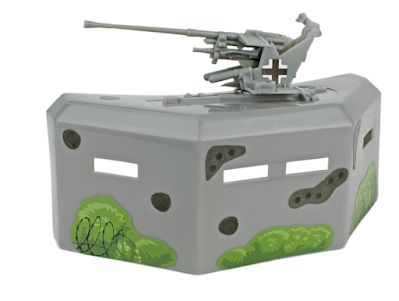 The stock BMC pillbox is pretty rudimentary, but the AA gun on the roof is a really nice touch.


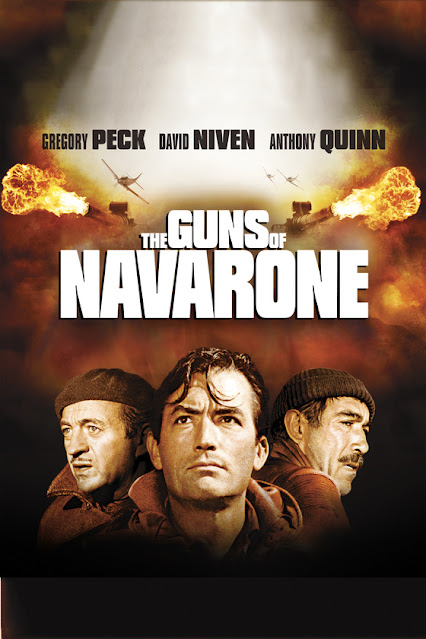
When I was a kid, back in the late fifties, early sixties, my parents would occasionally drive in to Saginaw (Michigan) for dinner and a movie. This was only maybe a yearly event, so it was a pretty big deal in our house. We always anticipated the return of the folks as our mother would give us a dramatic retelling of the story.
Her relating to us of the plot of The Guns of Navarone was absolutely thrilling, and how I longed to see that movie; but money was tight and we were seldom taken to the movies. Nonetheless, I had full-page ads from the Detroit Free Press of the movie, and Gregory Peck, David Niven, and Anthony Quinn - sight unseen - became my favorite actors for a while.
I don't know why, but the idea in this movie absolutely captivated me.
In my senior year of high school the community college that served the tri-city area (Delta College) had a FREE screening of The Guns of Navarone. The folks loaded all the kids in the car, drove 25 miles to Delta, and ended up in a classroom with a portable screen.
"Will somebody please get the lights?"
Lights off, shades down, projector snapped on, and the incredible yarn unfolded. I ate it up like ice cream.
Much time passed...fifty years to be exact, and I was looking for a new toy soldier project. The BMC pillbox caught my eye and I thought I'd try my hand at giving it an upgrade. I went to Lowes and got a bunch of foam insulation sheets, got out my foam-cutter, and went to work.


I started laying out pieces on the foam sheets, and with my nice wire foam-cutter, I began cutting out the various components.


.heic)


I added a concrete bulwark to the roof, and a rocky piece of terrain for the base. Integrated in the base are "concrete" stairs, entry, and passageway.


I was pretty happy with how it was going, though in retrospect, I wish I had thickened the walls around the gun-slits.

With paint and brush, I applied weathering, highlighting, and a typical German camouflage scheme for bunkers and emplacements.


I made two of these, I was happy with the results, and I considered the project complete. Then, about a year later, I found an incomplete Marx Navarone playset on ebay, and an idea started percolating.
I decided to make an elaborate terrain piece to go with it, for play on the toy soldier table.

The two pillboxes were a natural for flanking the mountain.

I wanted the terrain to have a hostile, foreboding, and utterly inhospitable look...and I achieved it in a very simple manner. A few years ago, quite by accident, I discovered that an application of spray-paint will corrode styrofoam and give it a very rusticated appearance, and this is the method I used to achieve the look I wanted for the Navarone terrain.

Areas that were to be gun emplacements, roads, and places for buildings, I masked off from the paint.

I used acrylic paints for the terrain. First I gave an undercoat of black, then I mixed up a nice medium gray, and finally I applied light gray highlights. I was very happy with the results.


Then came time for an appropriate backdrop. I wanted to keep my Civil War landscape intact, and had to figure out the best way to create a new, and temporary backdrop. Frankly, the thought of this much work caused me to procrastinate, to the point that the project went dormant for about a year.
Then I accumulated some large sheets of cardboard, and the path became clear.
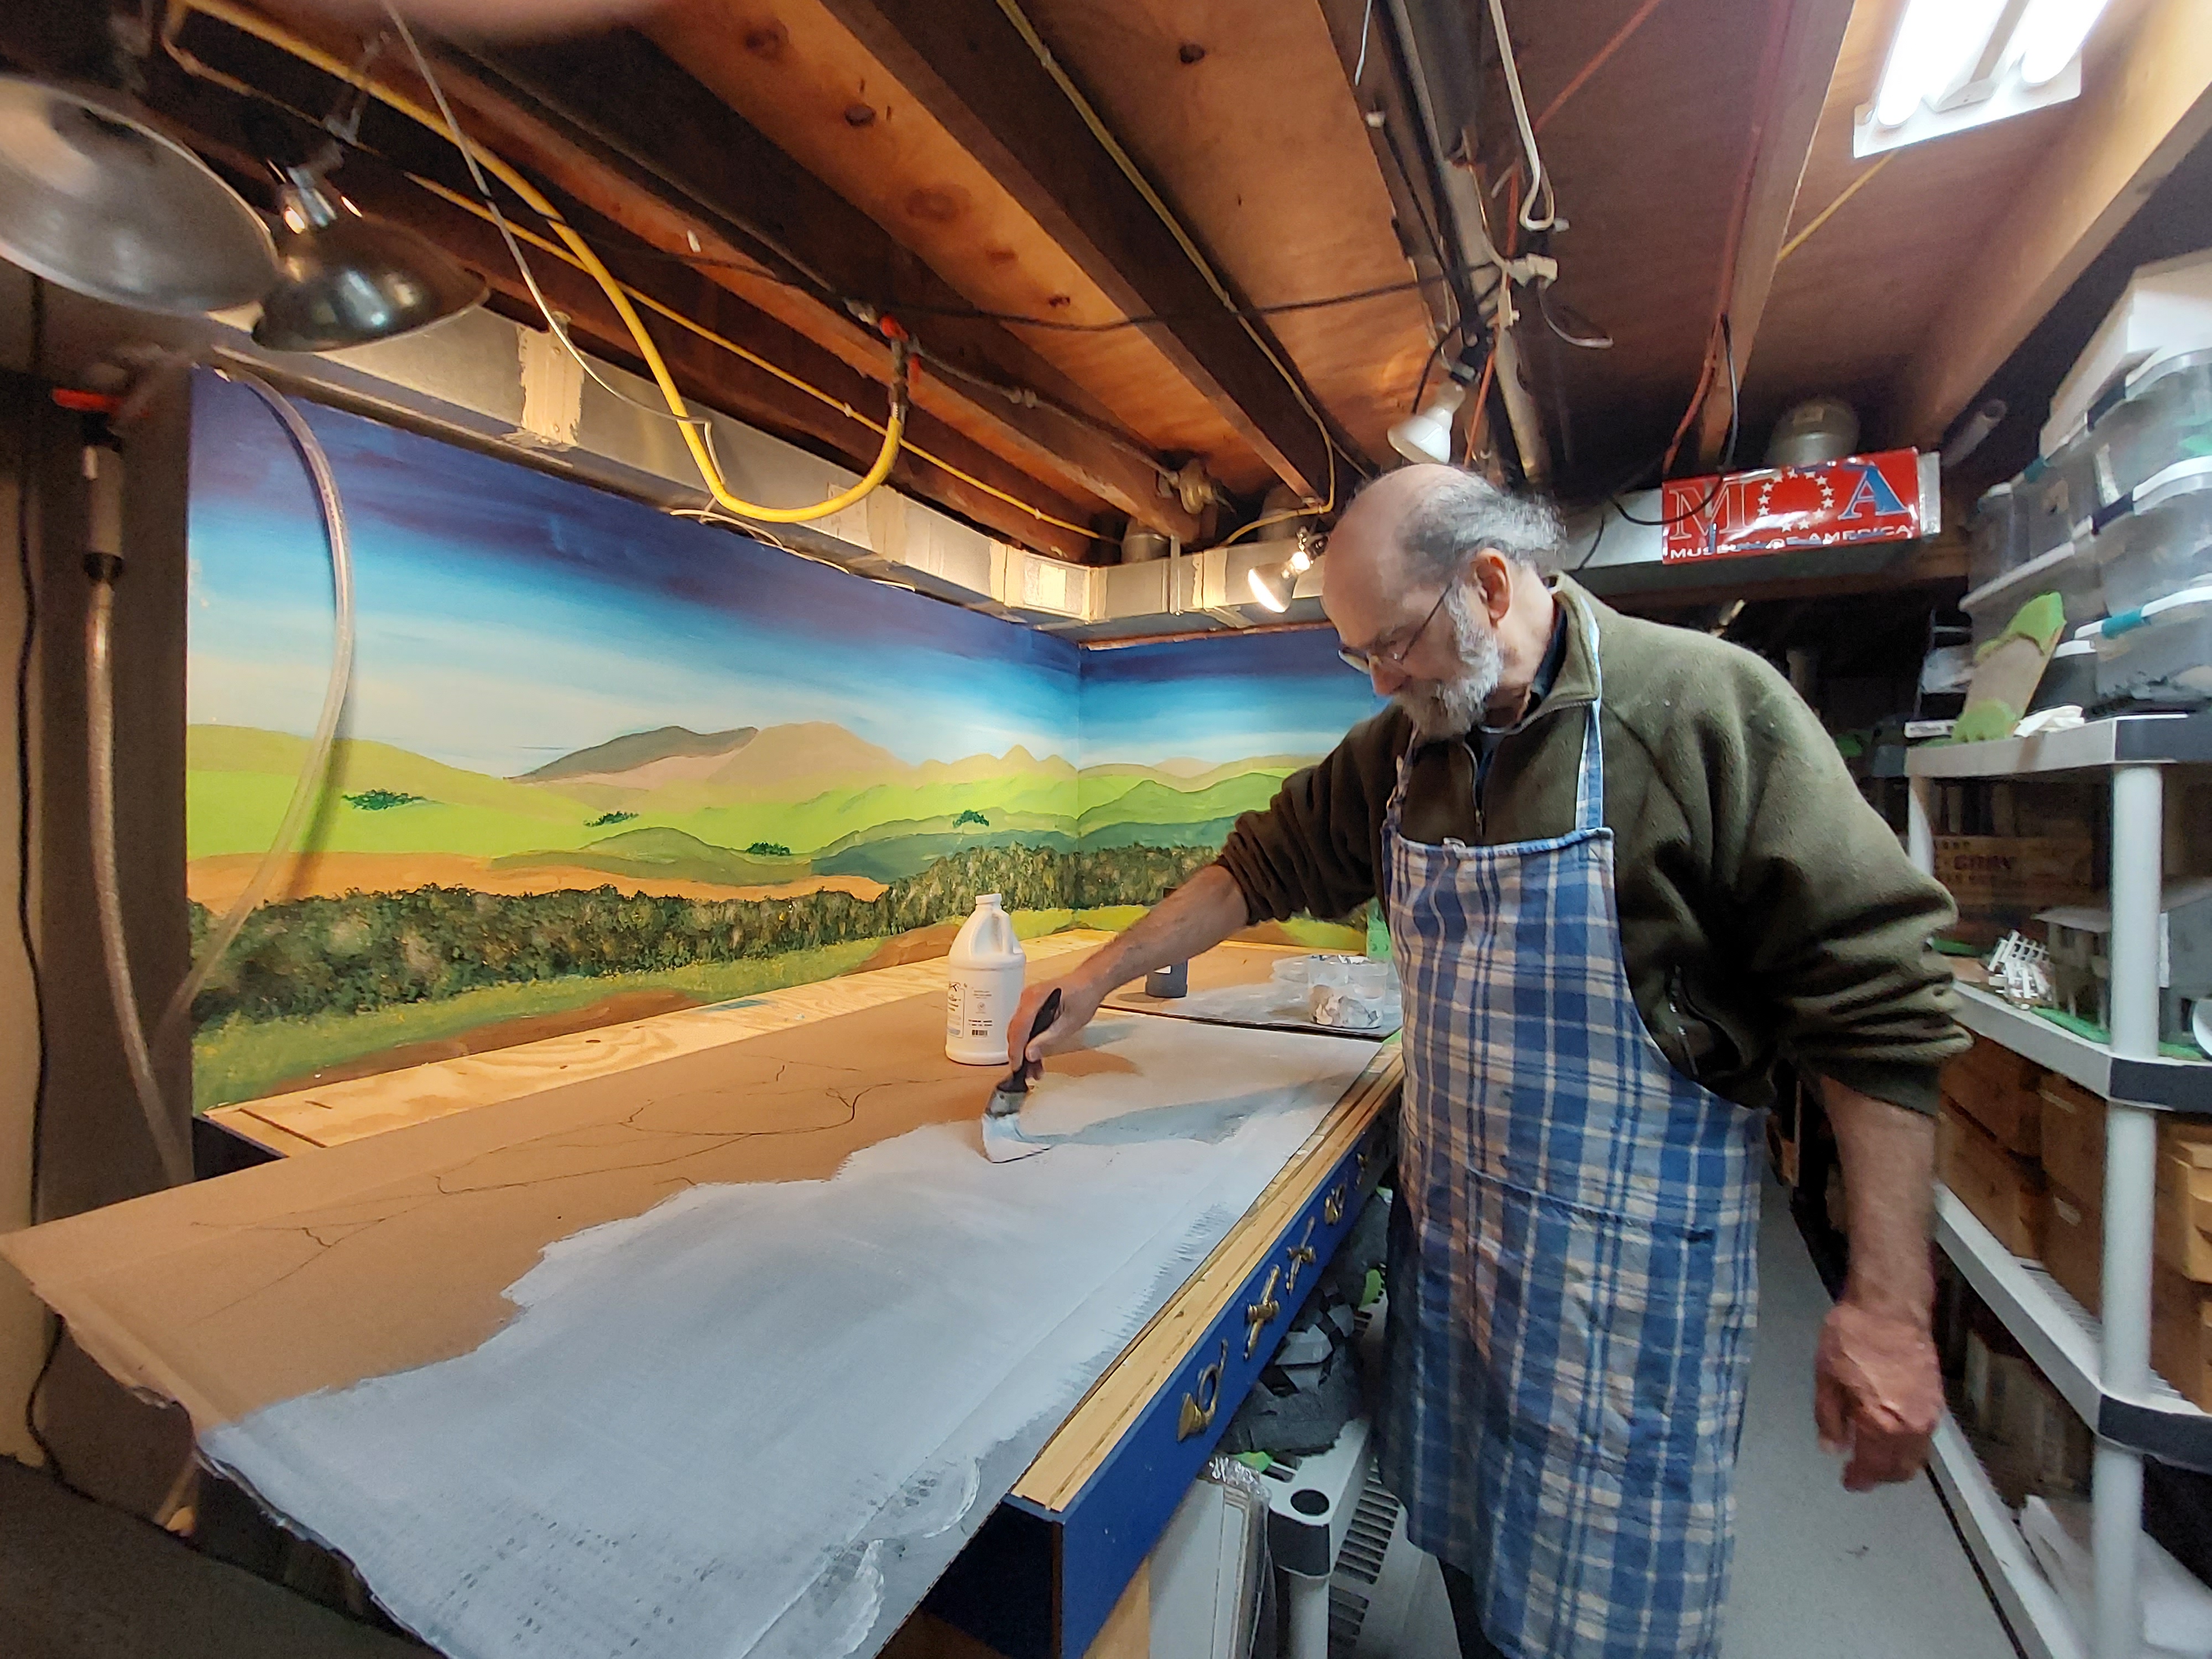

As with the terrain, I wanted the backdrop to be comprised of a foreboding gray sky and a hostile mountain range. I used a simple palette of black and white, resulting in various values of gray from light to very dark.
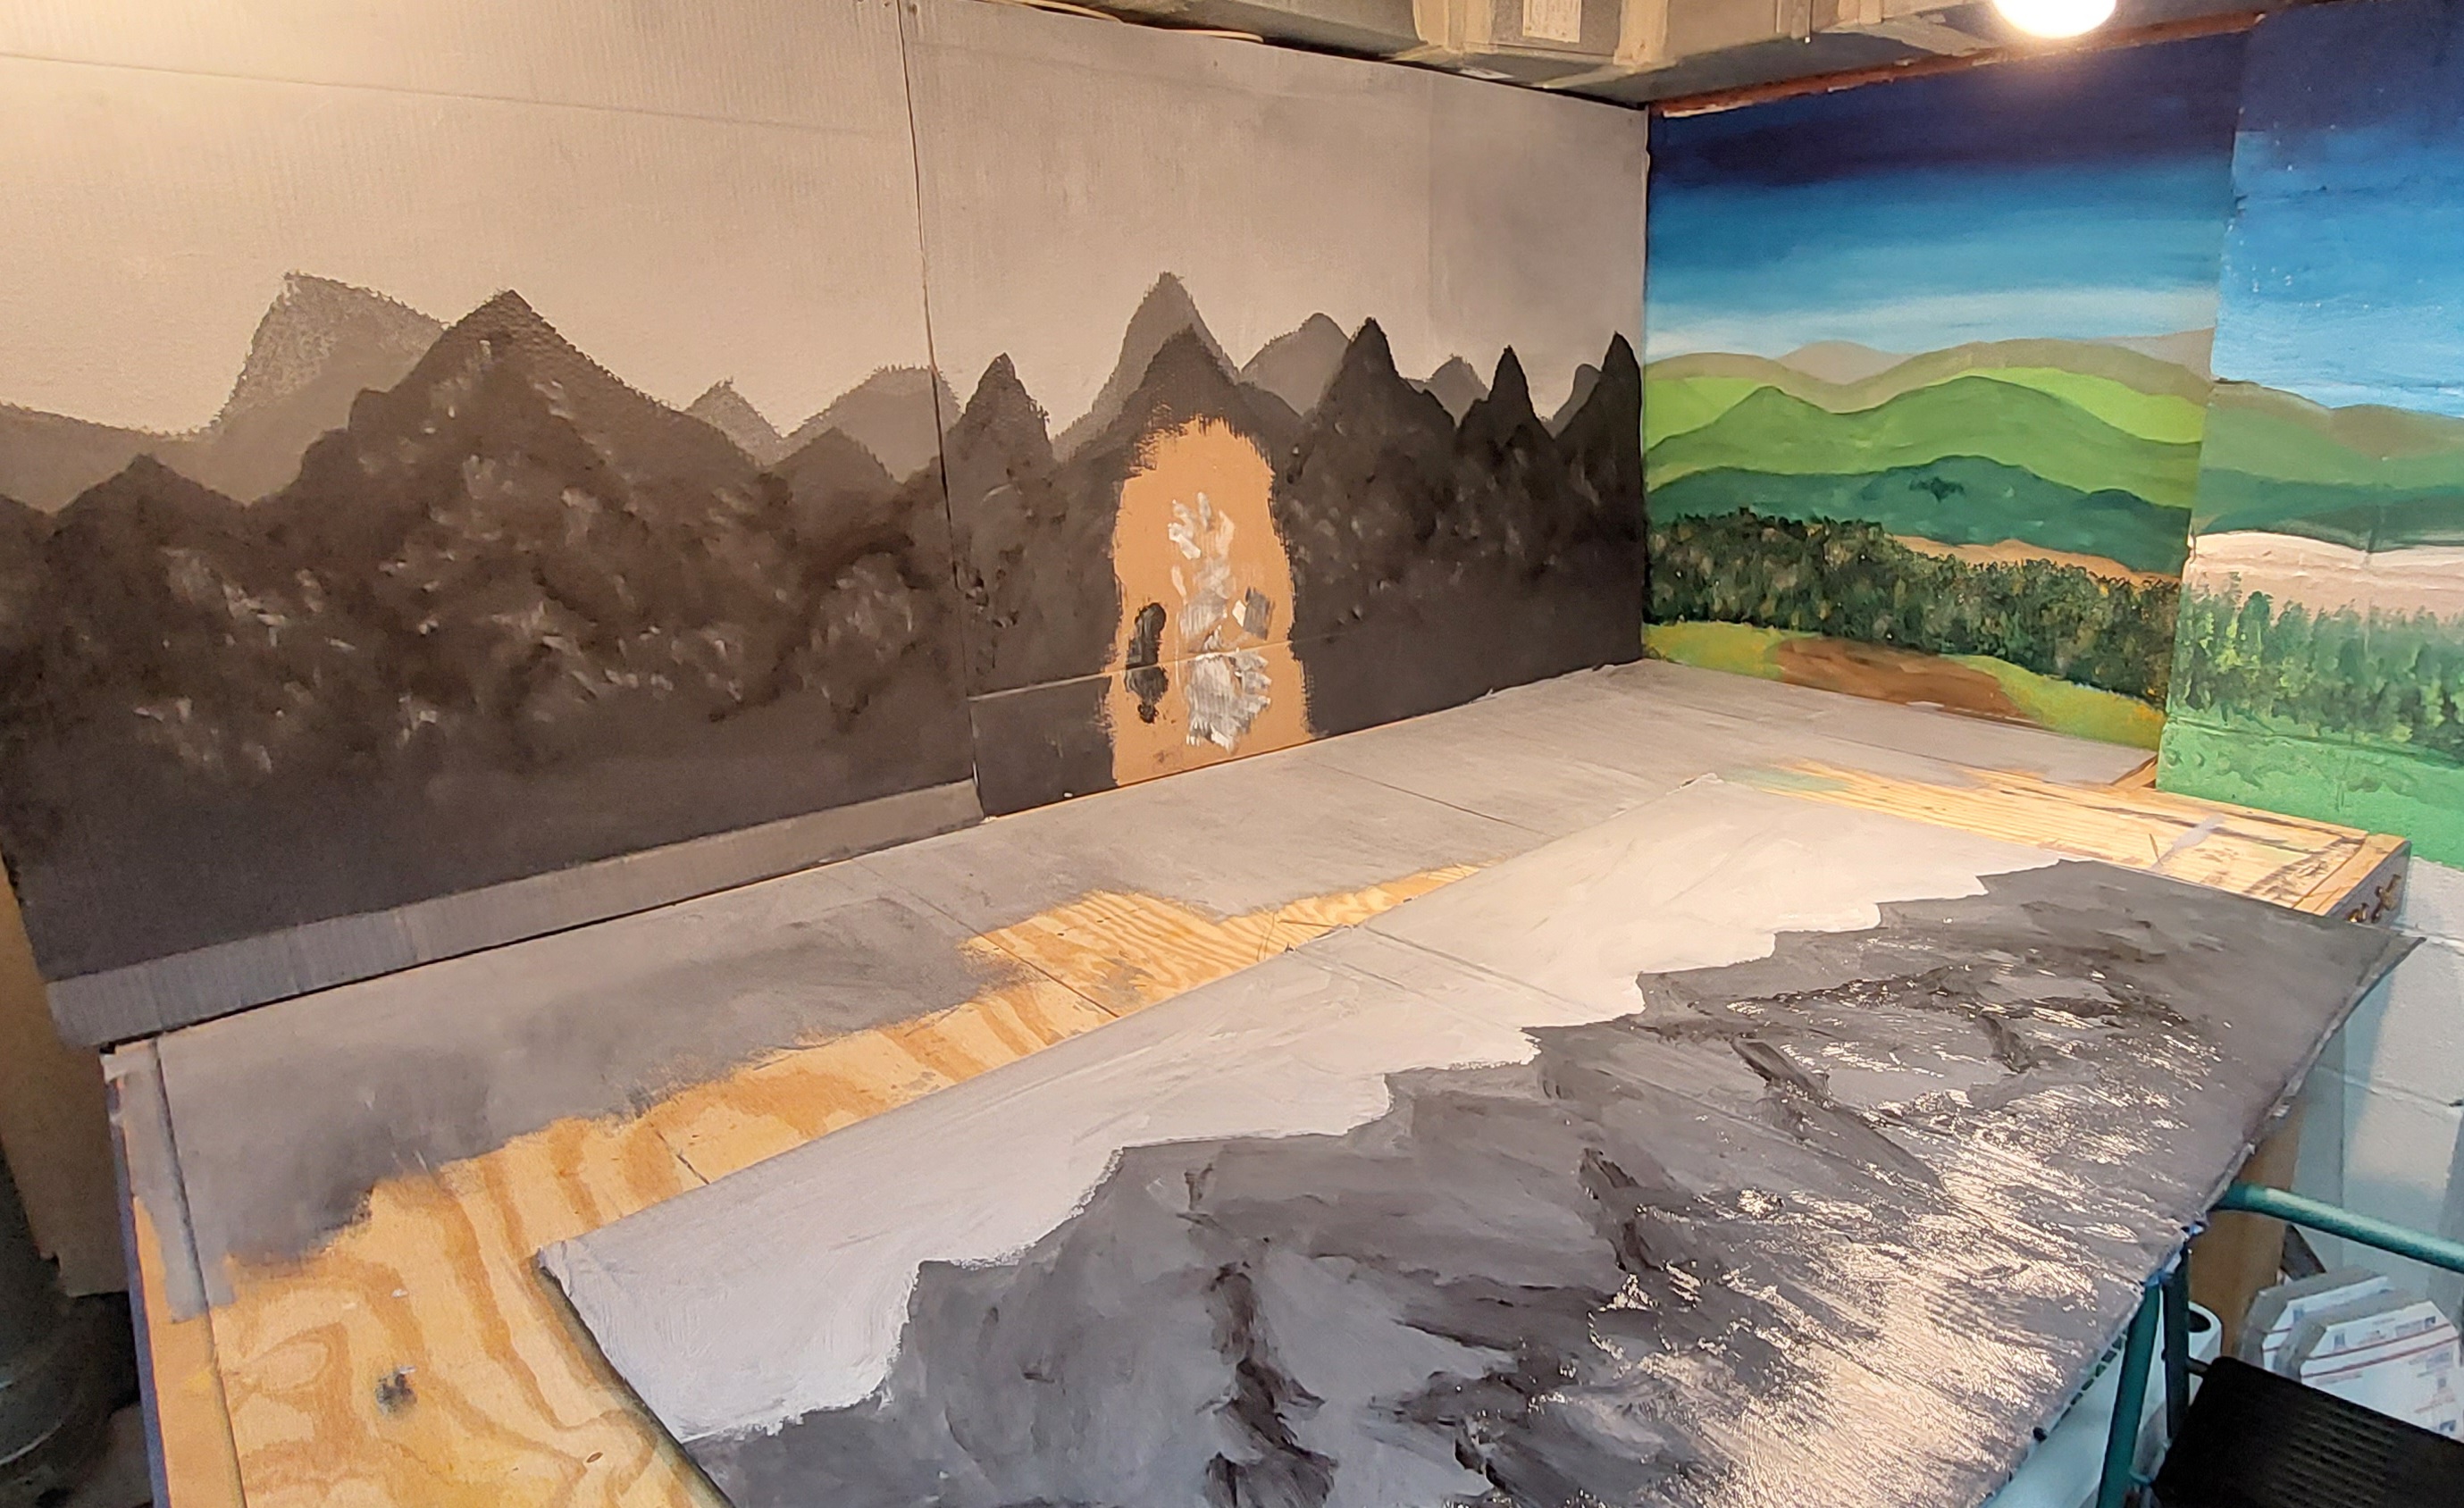

With just a few drywall screws, I affixed the temporary backdrop to the walls.

With the backdrop complete, it was time for a test fitting.

All of the components came to the table, and it was time to make order out of chaos.
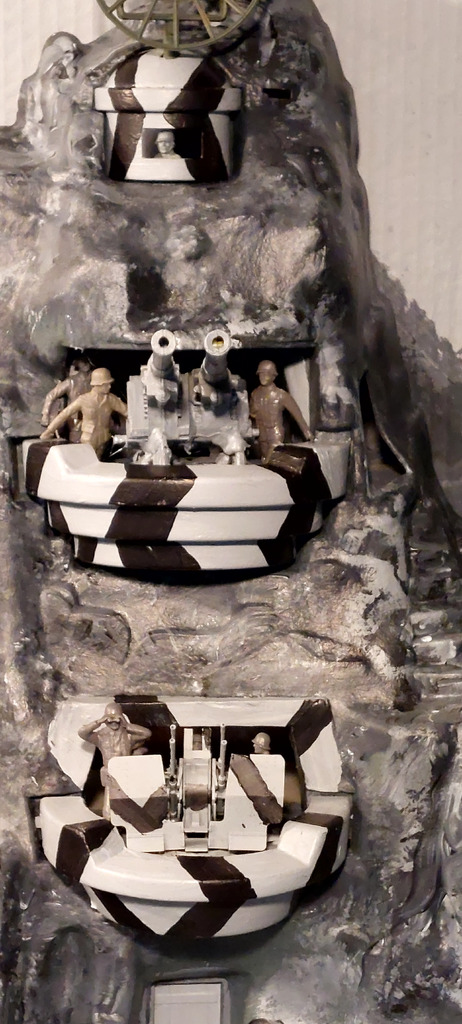
In the movie Navarone mounted twin guns, but the Marx version had two single guns, though separately in upper and lower gun galleries.

On ebay I encountered a person who 3D prints the Navarone guns. I bought one (a perfect copy) and paired it up with the Marx version to make a single twin mount.

The Marx guns were a garish yellow, so I painted mine gray...big improvement.

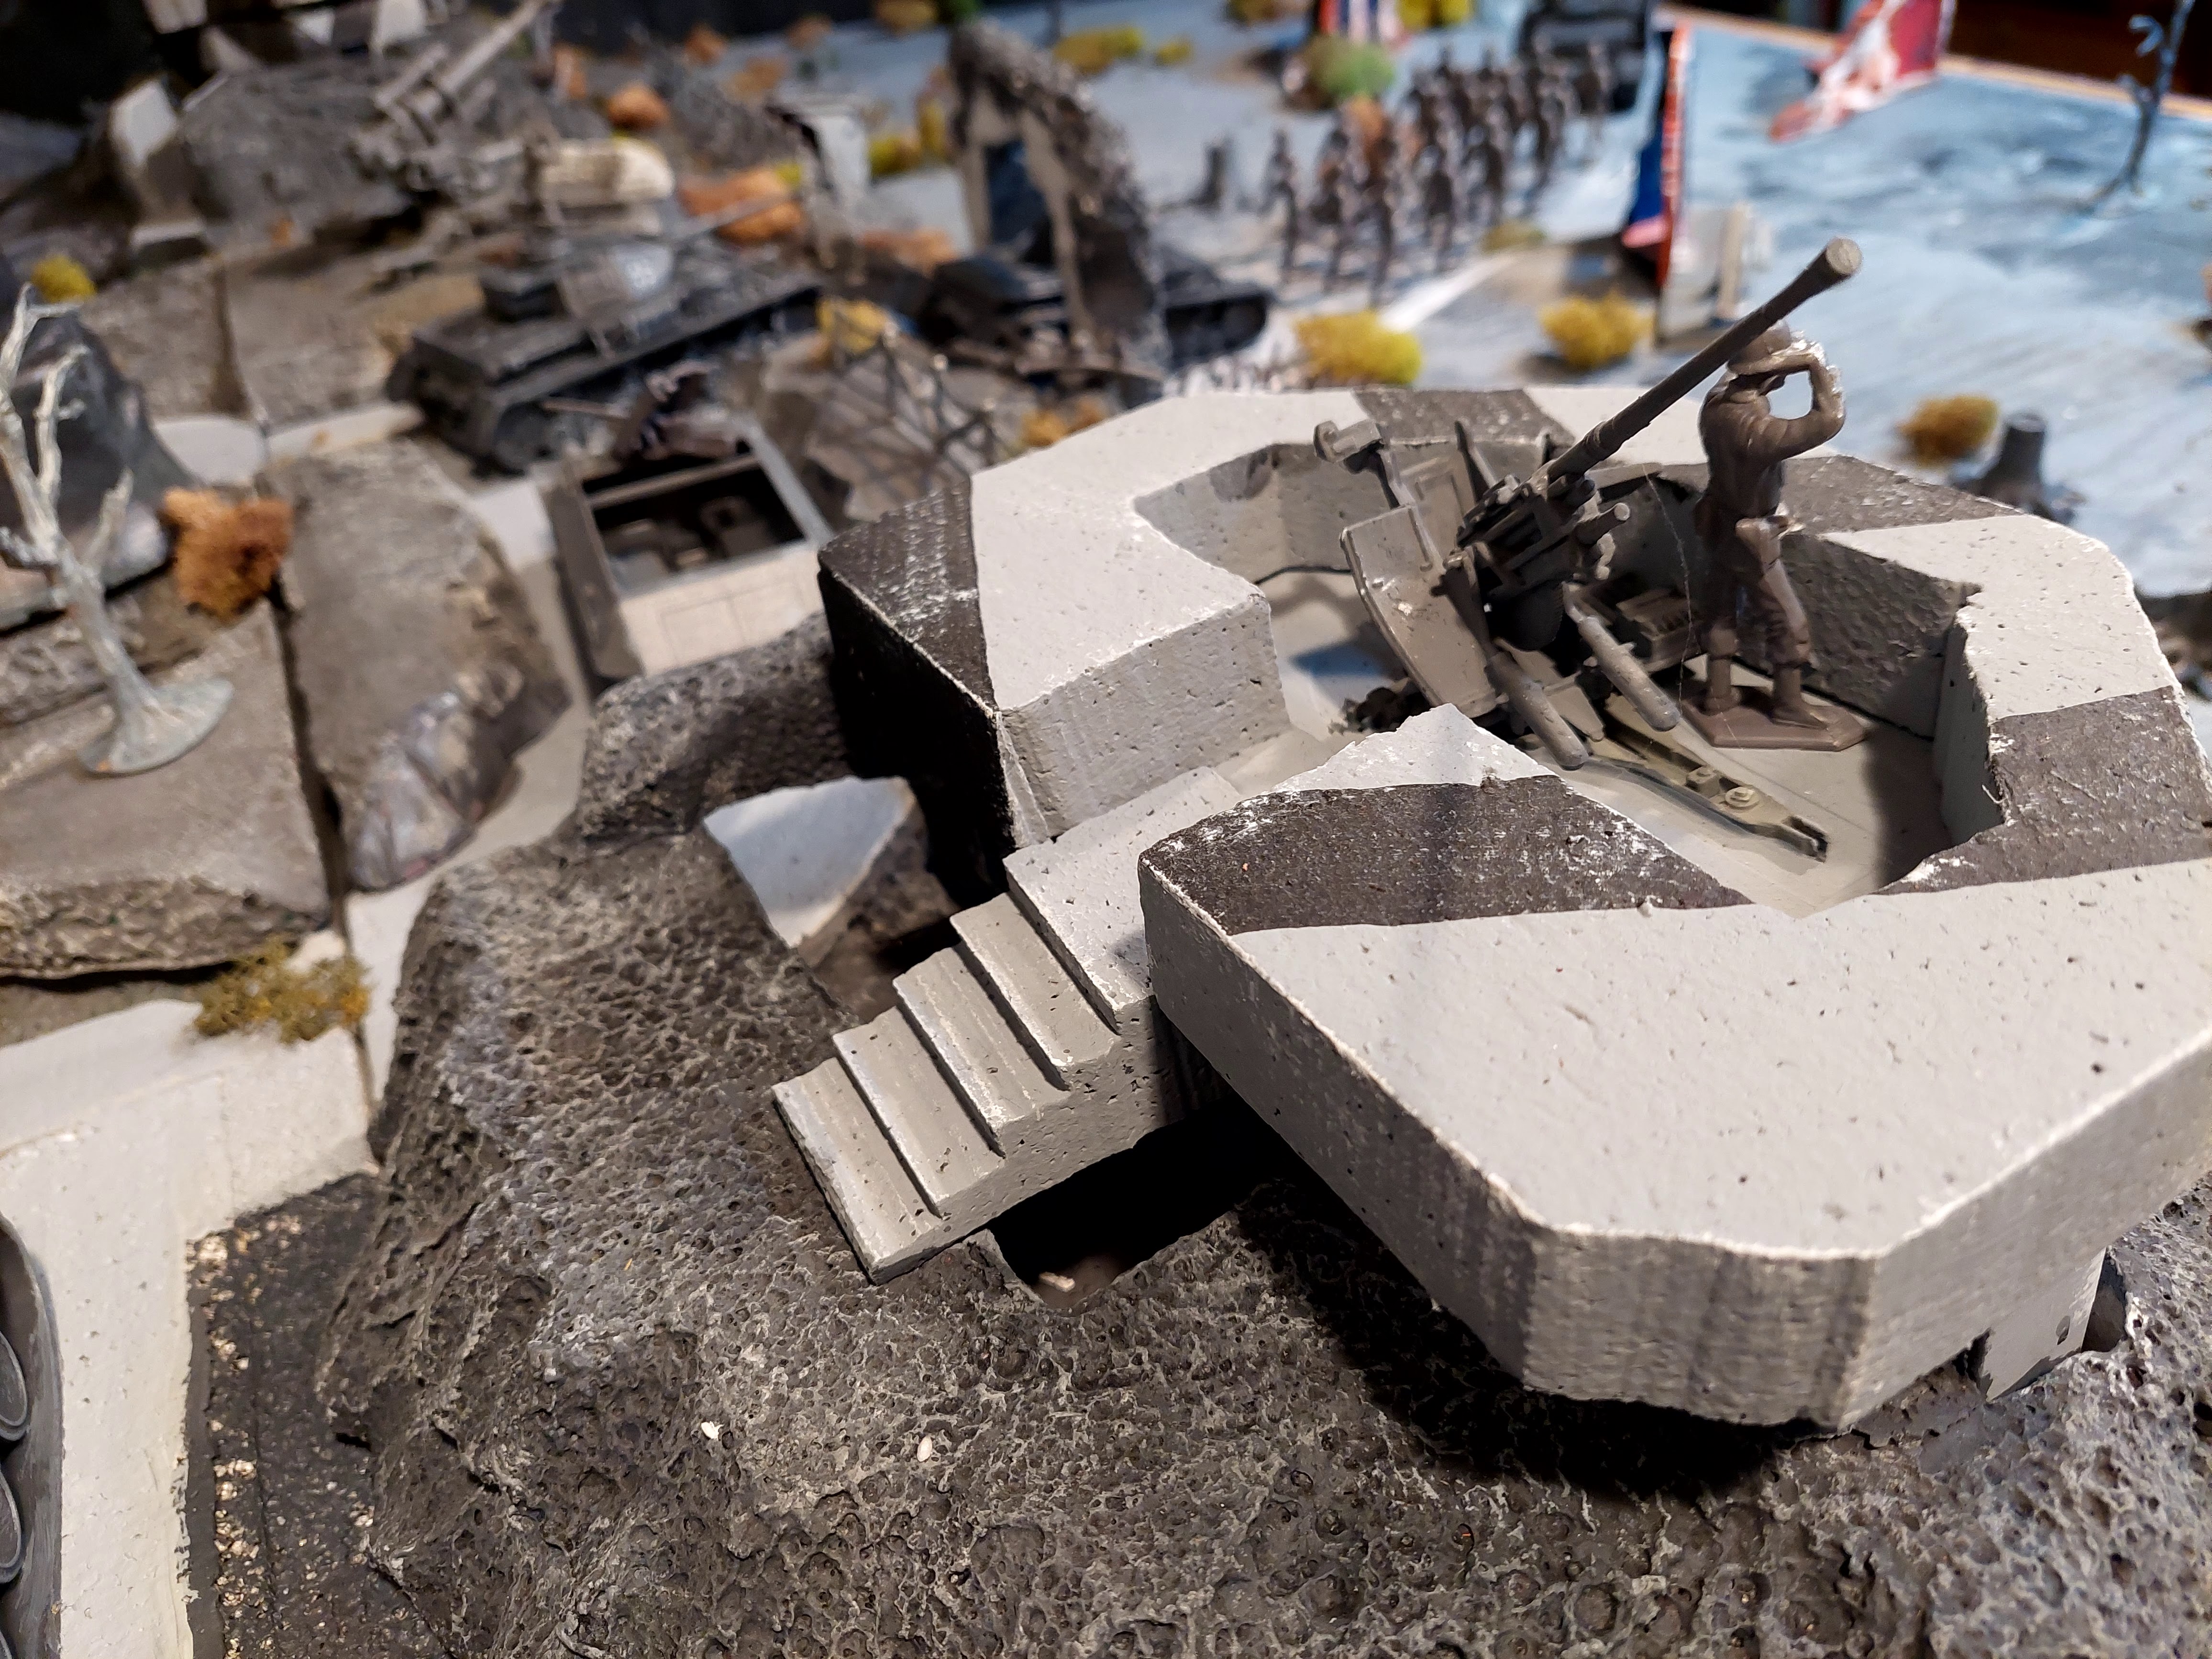
The lower gun gallery, had a slightly shorter version of the big gun. To make the mountain more like the movie, deleted the lower gun and assembled the Tamiya quad-20mm and installed it into the lower gallery as a pretty convincing anti-aircraft position.

I hot-glued the gun crew into position so that I won't have to worry about them falling back into the mountain...though, it does prevent them from being knocked down when shooting rubber bands at them.
What follows is a walk-around of the finished project. Some of these pictures are a little redundant, and there are probably way too many photos...but what the heck, we toy soldier nerds are all in this together, so I hope you enjoy the ride.


This project was a real mix of toy brands. Most of the vehicles are CTS.


BMC pillbox with Marx Battleground barbed-wire fence.

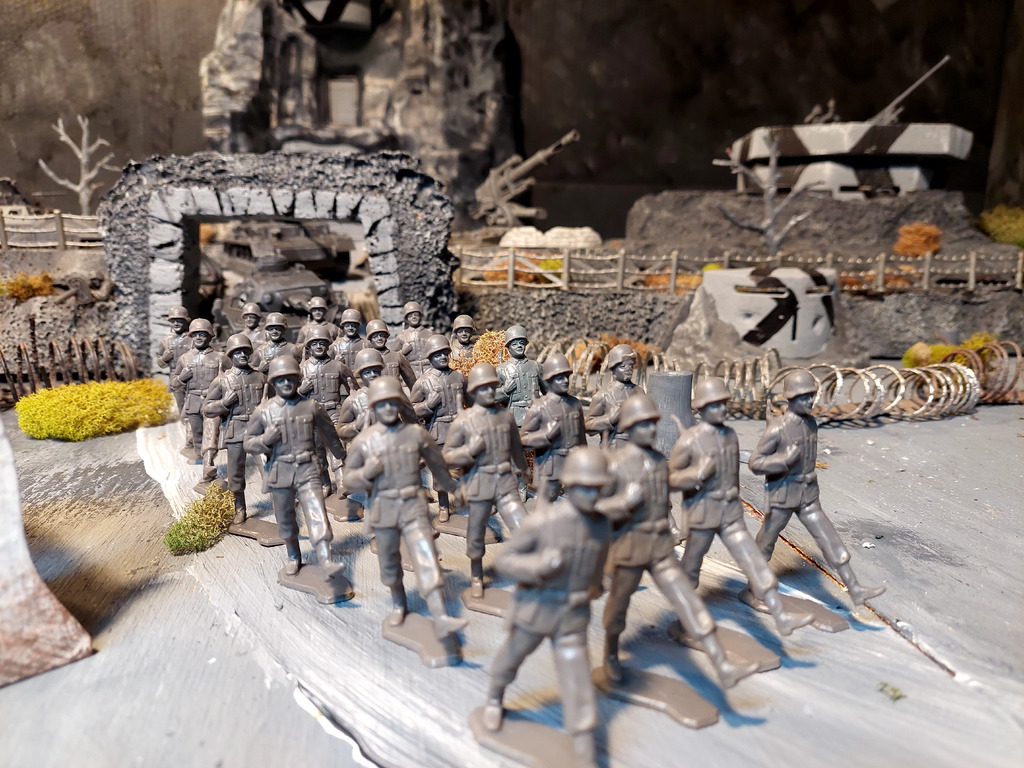
The soldiers are various brands - here are the Marx goose-steppers; a mix from Desert Fox and Battleground.

All over the table are the Marx dead trees and there are also two of those funny looking Marx pillboxes...I've never understood the vertical slit. I remember as a kid, poreing through the Sears wish book and wondering why "masks" were included in the Battleground sets. I guess I hadn't had much exposure to what pillboxes looked like...pre-internet, don'tcha know.


There are two machinegun strong points on the flanks of the whole complex. You can see how I painted the Marx terrain pieces by clicking here.


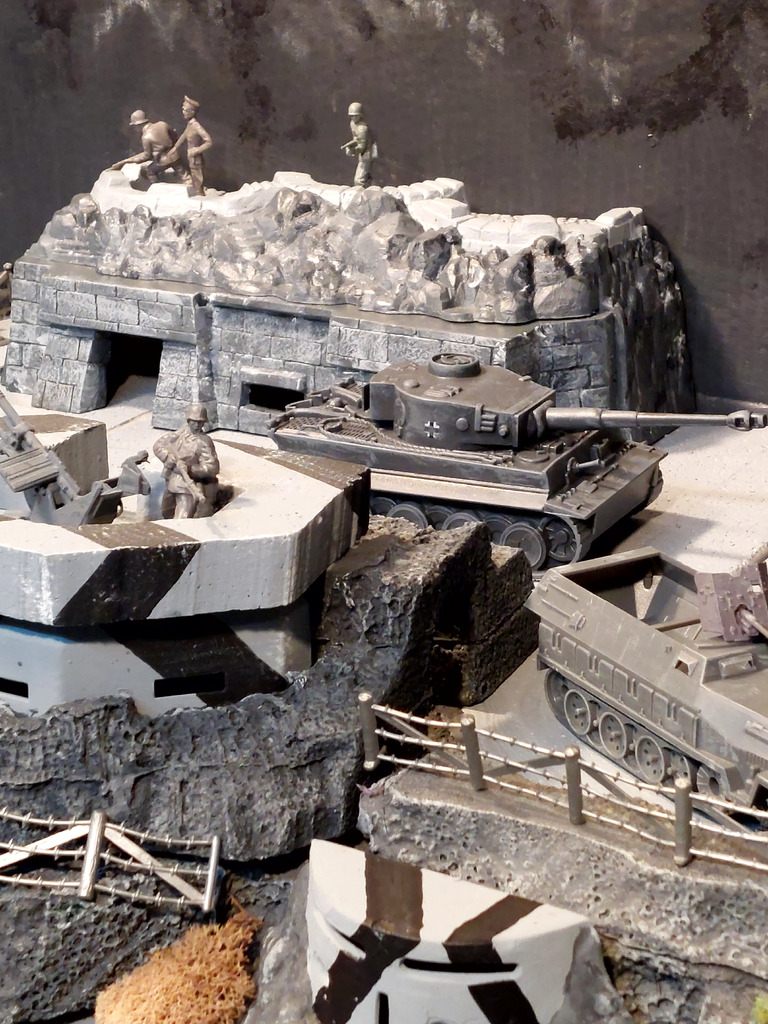
This fabulous cut-stone looking, bunker was part of an odd lot that I got on ebay. I think it's MPC. If I'm mistaken, please correct me in the comments below.


The CTS vehicles come in dark gray, and I gave them a little light gray dry-brushing to bring out the detail and also to make them stand out better against the dark gray terrain.

This is the non-firing version of the 88 that came in the later Marx sets.

I turned the Marx exploding house into a bombed-out cafe. The color scheme is typical of the houses in rural Greece. (again, return here for some background)


Here are the twin guns from the movie, and from my recreation (below).


Marx, BMC and MPC, all in one glance.

The Marx motorcycle with sidecar leads the way.


The stone archway was almost an afterthought. I'm happy that I added it.


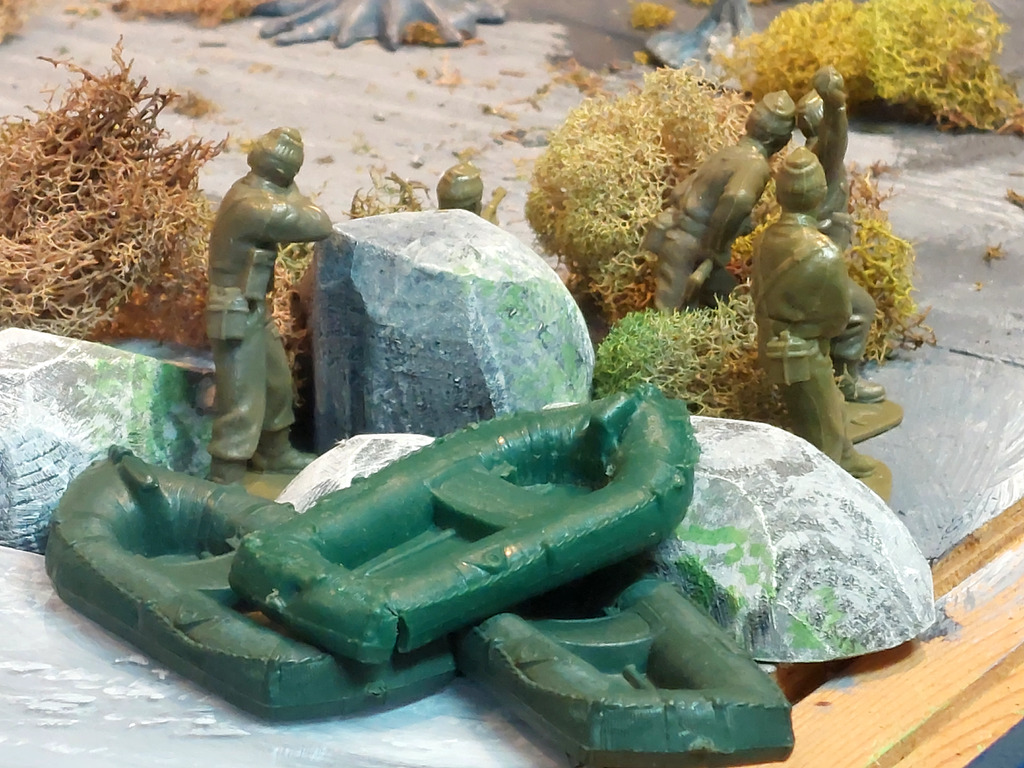
During the night, these concealed British commandos arrived on the beach, unseen by the Germans.
.heic)
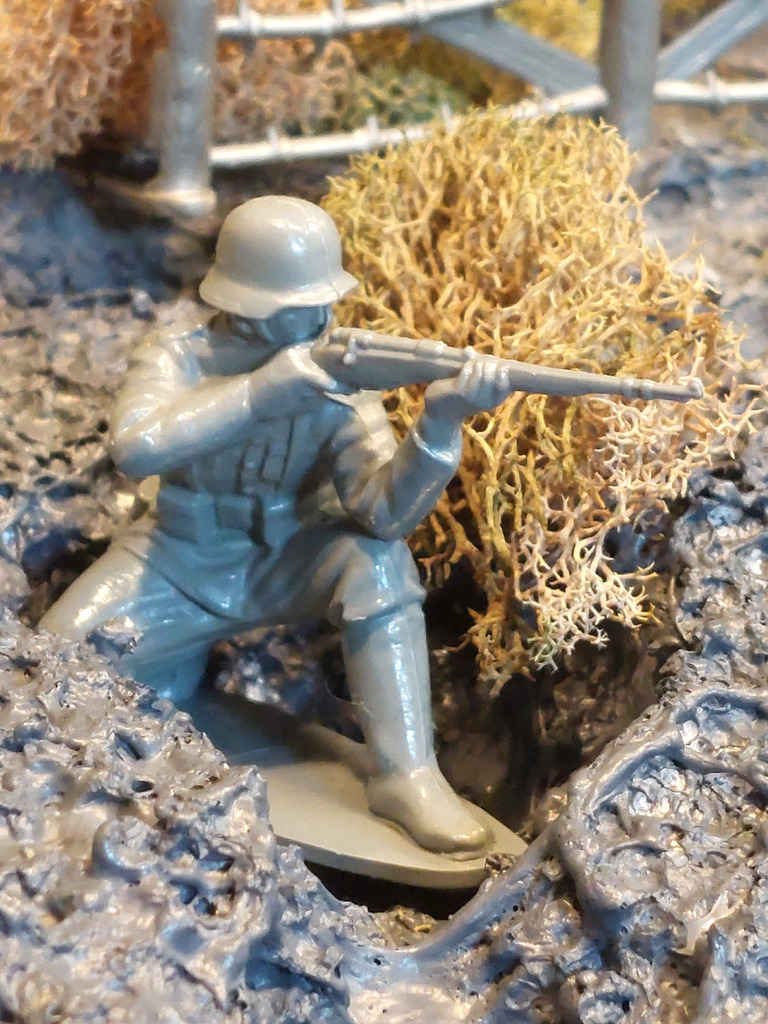
Fritz and his chunky panzerfaust, looking to do some damage.


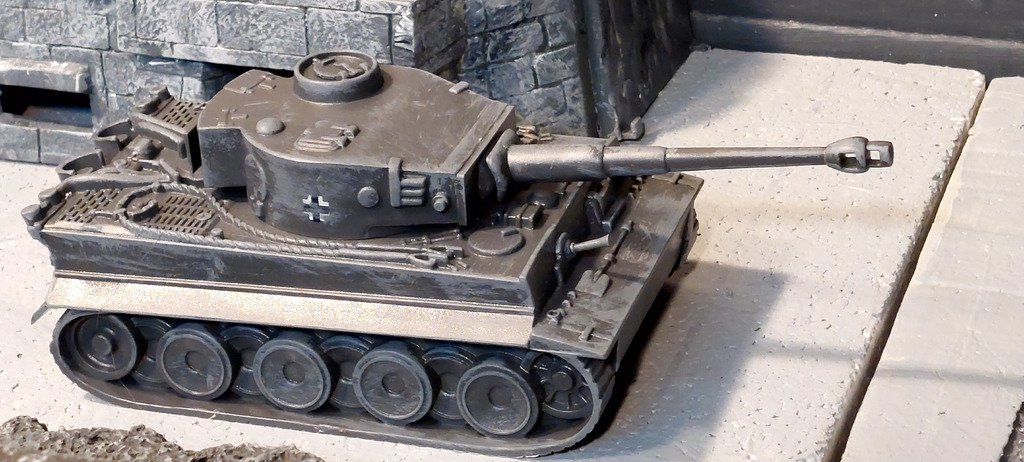
Sturmgeschutz all snug and cozy, covering the road...

waiting to snack on Shermans.


I wanted the guns to be even more threatening, so I provided radar fire-control. The radar dish is from one of the trucks of the Marx Training Ground playset.
The soldier peering out the window is a classic Airfix figure. He's cut off mid-chest and hot-glued into position.


Model railroad lichen has been around for a very long time and it's a very simple way to bring more color and animation to a soldier set-up.


These CTS tanks are really nice.


Marx Battleground dragon's teeth protect the flank.

Though it looks impregnable...

these five British commandos are pretty confident of success...
and so am I.

The battle begins next time. Until then...
Soldier on!
Mannie
2 comments:
Wonderful Mannie!
Splendid stuff! More please!
Post a Comment