Sunday, November 28, 2010

Something sort of new from Imex (sort of)


Honeymooning last week in Gettysburg found my bride and I at one of our favorite places, Gettysburg Pa (did I just repeat myself?).  While there, we swung by one of my favorite shops "Gettysburg Miniature Soldiers" to see what was new.


Much to my delight I found a very inexpensive bag of 40 soldiers, soldiers that I don't have, but which were vaguely familiar.


Though the label touted these as an Imex product, it was immediately clear that the plastic armyman industrial slave laborers deep in the bunkers of Red China have resculpted many superior Imex figures in a rather haphazard way. 


 Note that this one looks like he's right out of a Red Chinese  revolutionary poster, with the light of the Chairman's wisdom shining brightly on his upturned face.


This officer is very much a "B grade" version of a better Imex figure.  But there was another surprise contained in this delightful assortment. (oooh, very Tron-like background, notes co-worker Meg)...


Look, its a redone MPC figure.  Finally, a mediocre figure redone in an even more lackluster fashion.  One must wonder why the Imex name was attached to such a substandard figure.  I'm  certain many malcontents will blame it on Obama.

Odd knee, BTW.


Advancing flag guy, with upturned face, is actually quite nice though the tiny flag would be dwarf-like in any battle scene.  Otherwise the sculpting is quite pleasing.


Anyone familiar with Imex figures will recognize standing pistol shooting guy.  The detail is a little clumsy, but he is a welcome addition to any battery being threatened by advancing graybacks.


I think bugle guy is an Imex redo, or perhaps Marx? hmmm, seems I've seen him somewhere before, but I just can't place his face.  Nonetheless this is one of the better figures in the bag of 40.  I especially appreciate the musicians piping on the front of his shell jacket.  Though why buglers are nearly always sculpted with unholstered pistols is quite beyond me.


Another Imex resculpt.  Of particular note is the enormous trigger guard on the rifle.  Not sure what's going on with that.


This prone shooter is another incarnation of the same pose in the MPC stable of originals.  Prone shooters give me a pain.  Makes me want to shout "Hey buddy, good luck reloading!"...dope.  Prone shooters are my second least favorite type of ACW figure.

And here's my number one least fave...


Stealthy crawling guy.

 Please, such a waste of plastic.  When did one Civil War soldier turn to another and remark "Hey dude, let's start fighting like they will in World War Two, that way historians  will criticize us less in the future." Dopes (historians, that is).

Crawling figures are nearly worthless, unless paired with another nearly worthless pose; the downward-bayoneting guy.


This clearly works.  Never stop thinking like a nine-year-old boy and everything will start making sense.  "Take that you slave-freeing blue-belly scumdog!"


This dopey-looking guy smacks of MPC though I've not exactly seen him under that brand.  From the waist up he looks quite similar to the MPC mounted bugler.  I'm at a  loss to explain his flag-bearer's harness and the enormous aquebus he's toting.  On closer inspection his bugle looks more like a misshapen wine bottle.  Cheers! Johnny reb.


Rock and heroin legend, Pete Townsend as Confederate soldier.  Interesting pose, great hat. I do like the chunky bases on these soldiers.  They're solid. won't warp, and will stand up on an uneven surface.


Of note is the fact that in this entire assortment of 40 figures there is only one conventionally firing figure.  This standing rebel, who seems to be having some difficulty fitting his trigger finger into the trigger guard (odd, considering the above-mentioned trigger guard) is the sole firing-line figure.  The paucity of kneeling or standing firing figures is perplexing.


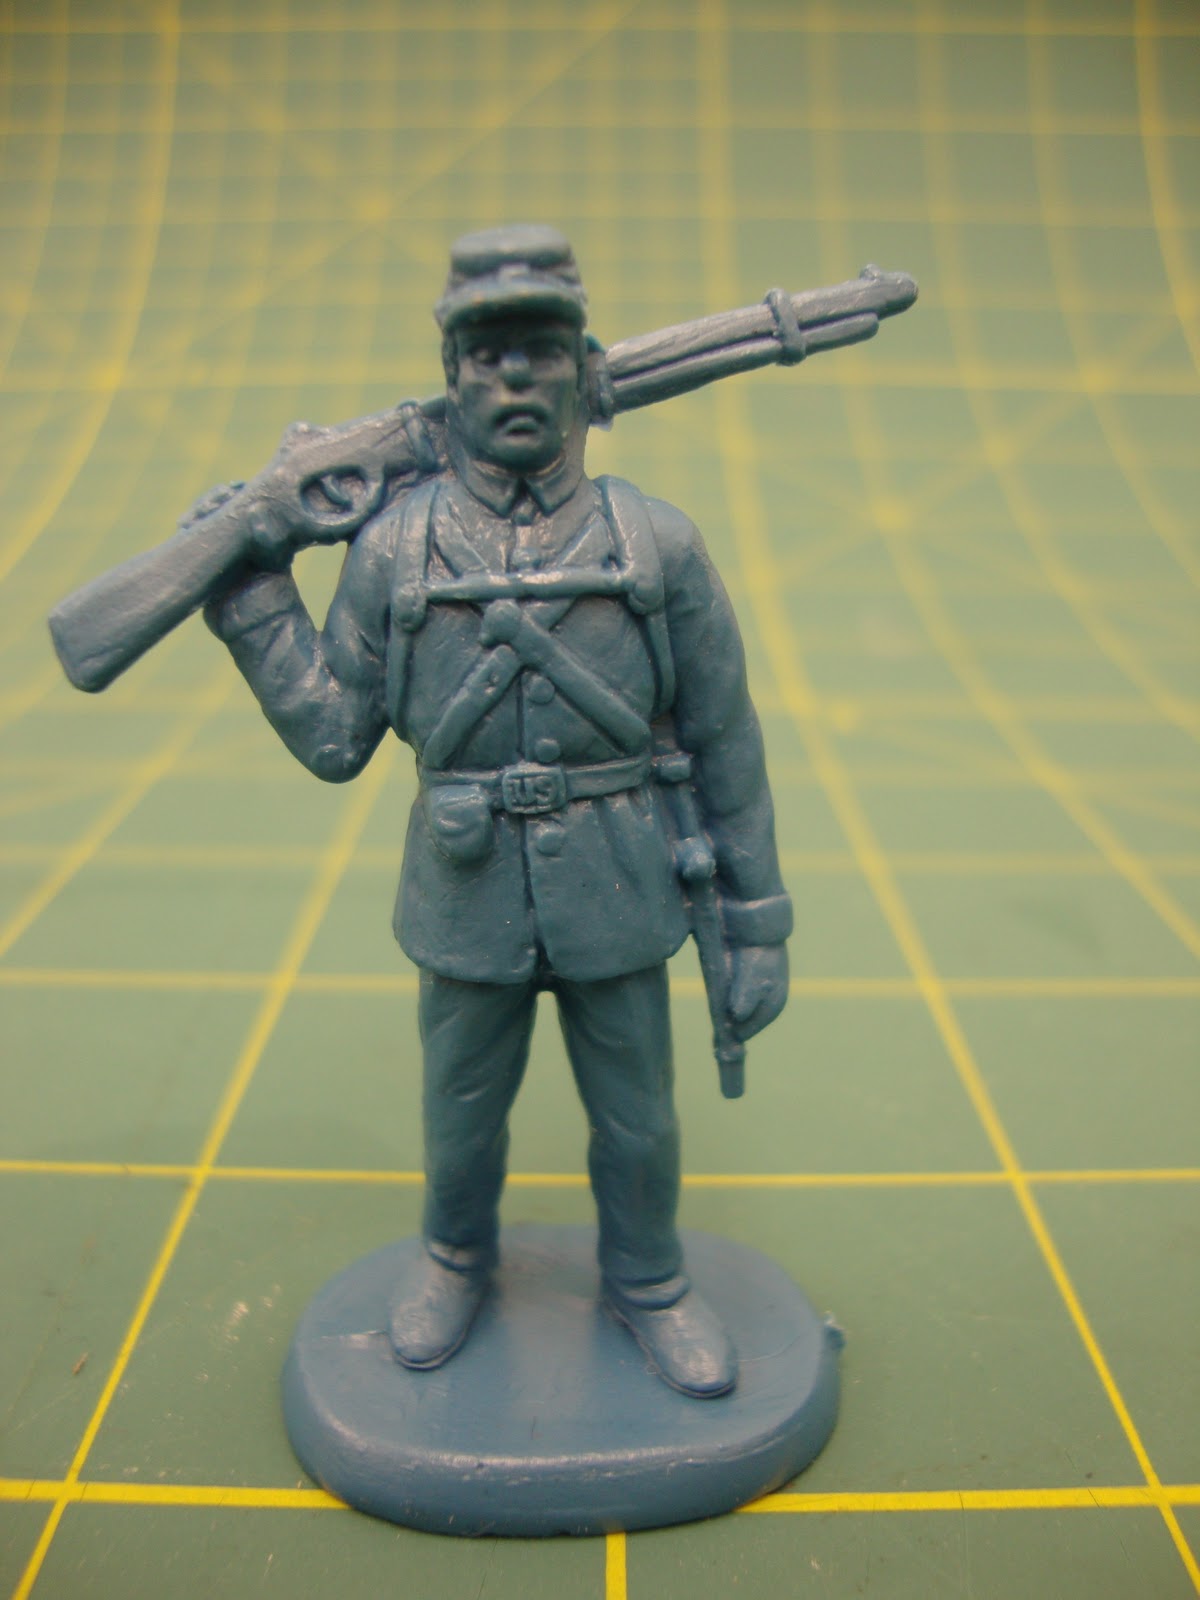
This son of the south is either calling to the attention of his comrades that he's about to shoot his toe off...


or directing their attention to his enormous trouser-fly.  An interesting Asian perspective on American anatomy.


Oh my!  It's Charles Bronson.  

n'estce pas?


This hapless chap appears to have just realized that he left his ammo back in camp.  This is a pose quite unknown to me, neither Imex, MPC nor any other that I can identify.  Perhaps a reader can help out here.
It's another example of the very clumsy sculpting of the rifles among these troops.


Confederate soldier, or simply Saturday night in my mountain neighborhood?  Relax, it's just another frightened redneck. 
.

Not yet mastering the manual of arms, this rebel GI seems intent on not loosing his rifle.  Hang on tight pal.  I wonder when Charles Nelson Reilly needs his scarf back?


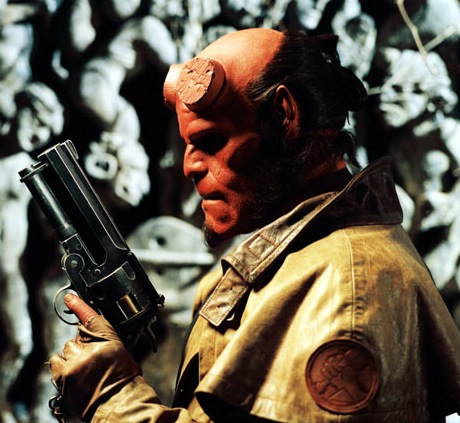
This Confederate officer is clearly a fan of the "Hell-Boy" saga.  The outsized gun is a dead-ringer for The Samaritan.


This pose is utterly inexplicable...


from any angle.


At $7.99 for 40 soldiers this is a good deal.  New, and new-old poses means plenty more reinforcements on the cheap.


Here they all are at the company party talking about how Imex has really gone to the dogs since the early days.


Evident in this shot, you'll take the good with the bad in this grab-bag, and fortunately there's plenty of good and even the bad makes adequate cannon-fodder in a pinch.

Next trip to Gettysburg, be sure to swing some business into Gettysburg Miniature Soldiers, a really nice little shop, in a great little town.

Soldier on!

Mannie


Tuesday, August 31, 2010

Walkerloo's Free Armies are on the March!


I encountered the work of Christopher Walker maybe a year and a half or two years ago and his work really captured my fancy.  He makes paper soldiers of the Napoleonic era, and although his illustrations are meticulously researched and detailed he still brings to the transaction a delightful amount of cartooniness, or, as he terms it "expression and humor" in his soldiers.  I love his work.

His die-cut armies are available at his website which is nearly as entertaining as his paper armies.

Now Walker has launched a diabolical plan of majestic proportions.  In his quest for world domination he is pre-positioning his forces across the globe, possibly even into China and the hermit kingdom of North Korea.

He is making many of his soldiers available on-line and totally for free (especially if you print them off at  the office, moms and dads).  One needs merely to go here to begin the process.  

Slip a sheet of bristol board into your printer, hit "print".   Do it all over again after "flipping horizontally" and you are on your way to assisting Walker in his nefarious machinations,  and everyone will be have a lot of fun in the process (including the printer ink salesperson).

You'll end up with two mirror-image sheets.  Punch out the registration marks with a paper punch...


evenly spread a light layer of white glue on the back of one of the sheets and sandwich them together, making sure that the registration holes are in alignment.  I found it handy to press the glued sheets between books to keep them nice and flat while they dried.


When the glue is dry, fetch your X-acto knife (#11 blade) and start carefully cutting through the double layer of bristol to liberate your soldier from the sheet.


These free figures are really well designed for a DIY project as the cutting is not too complex (for an adult).  Miscuts were easy to avoid with some care and practice.


Once cut out and attached to his little paper cross piece he is ready to muster-in with the forces.


By the way, when printing, do direct your attention to the quality of print.  Higher dpi is to the left and lower dpi is on the right.  The difference in quality is, as one would expect, remarkable.


Though the Coldstreamers seem outnumbered, be assured that their comrades will join them as soon as another X-acto blade can be loaded.


The graphics are quite "graphic" when it comes to the wounded, unless, of course these are simply overly-exuberant participants from a chili eating contest.


Now, more evenly matched, the belligerents square off for battle.


These robust figures average four and one half inches in height (bearskins included) which makes them tower over...

 
their 54mm brethren, but this large size may also make them easier to maneuver by smaller hands.


"Haughty" rendered flawlessly in two-dimension.

Christopher Walkerloo's notes provide a wealth of historical information, and even in his text his humor is apparent.  Another very personalized aspect which makes these figures appealing is that Walkerloo himself models each of the poses, uniquely putting a little of the artist into every one of his drawings.

In addition to providing delightful soldiers, Walkerloo is continuing a long tradition of high-quality paper soldiers.  And in my opinion his style, breezy though it is, compares well with the classic paper soldiers of an earlier century, as seen here in the apres combat"battle of the bands" at which some Mcloughlin figures are participating.  


Finally, after all of the glue, paper, and X-acto blades are put away one is left to realize the real genius of Walker as the Clausewicz of paper soldiers. 

 In "giving away" these wonderful, but labor intensive paper soldiers, he makes it abundantly clear how much more convenient, and possibly less expensive, it would have been to merely have purchased one (or more) of his ready-made playsets on line.

Diabolical indeed!

See you all on or around the 15th.  Until then...


Soldier on!

Mannie

Tuesday, August 17, 2010

Iron Giant

(click on the pix for larger versions)

Several years ago I traveled to Fort Foote just south of Washington DC to see the Giant Rodman guns emplaced there during the Civil War to  bar the Potomac as a Confederate route of attack. 


 I've been fascinated with these guns ever since and have frequently thought of making a scale model of one.

Well, now armed with a woodshop the time seemed right.  This cannon project, like the previous one started with a nice poplar blank locked into the wood lathe.


Scale drawings guided every move...

and measurement.


Remove enough wood and the barrel reveals itself.


By keeping the ends of the blank attached to the barel, I had the dead center indicated which made boring out the barrel really easy, not to mention accurate.


Here it is, right on the money.


Back to the lathe to turn the trunnions...


which, after shaping with a small drum sander...


 were glued and clamped into position.


This Rodman gun has six wheels, two to return the gun to battery after the recoil caused it to slide up its inclined frame (thus absorbing the force of the recoil), and four large casters upon which the carriage travels along semi-circular tracks.


Again, I kept the stock ends intact to provice stable, square footings for accurate drilling and cutting.


As the upper part of the carriage took shape it was time to drill out shallow holes for the rivets.


When working in 54mm scale, to find a variety of rivets one need look no further than the nearest shotgun shell.  Number 8 size shot was ideal for this project.


A drop of super glue will keep all rivets firmly in position.


Finally, it came time to make and assemble the twin I-beam recoil frame.


The large pivot wheels were glued and clamped, with weight, into position.  Note that they are at a slight angle to each other, describing the arc'd tracks they will travel along.


The elevation lock was shaped by machine and by hand.


And glued into place at the rear of the upper carriage.  The holes correspond with holes in the base of the breach.  These were used for elevating the barrel and locking it into place.


To balance the barrel on its trunnions, I drilled a hole in the underside of the breech and filled it with shot, adding and subtracting until a perfect balance was achieved.  


At that point white glue was dripped into the hole and cured overnight, locking the shot into place.


The subassemblies were then moved to the paint booth for two coats of satin black paint.

Then it was time to turn my attention to the fortification that would place the gun in a context.  I chose to represent the handsome brick, stone, and mortar seacoast fortifications typical of the period.


Making an embrasure with a HSS hand-chisel was a real pleasure.


The various pieces of wood were then glued and clamped together.


Finally the gun is in context with the pivot tongue (forward) visible and the traversing rails executed in white styrene and superglued to the deck.

The pristine coat of black paint was weathered at this point by dry brushing with shades of gray, white, and graphite.


The pivot tongue captures a pin within the wall.  This allowed the gun to move left to right while staying captured upon its rails.


The styrene rails were rubbed with powered graphite and polished until they looked like shiny steel.  The deck was painted brick red and a "peach" prismacolor pencil laid out the mortar between the bricks.


The stone work around the embrasure was made with wood putty textured and painted to look like granite.


Moving the finished piece out into the daylight reveals a satisfying project completed.


Homestead safe from raiding gunboats, and I'm left to ponder...


about what the next project might be.

Soldier on!

Mannie