

Predator

I've been hunting for one of these guns for some time, it's the Premier's knock-off of the made-in-England Bollock anti-tank gun. These guns were manufactured in the early 1960s. I recently profiled the Premier's 25-pounder howitzer here.

This is a pretty impressive gun, measuring eleven and a half inches long and weighing in at exactly half a pound.


Many anti-tank gun splinter shields had irregular top edges, to reduce their contrast against surrounding foliage.

If this 57mm US anti-tank gun had a hard-edged rectangular shield it wouldn't so easily blend in with its surroundings, making it more prey than predator.


The trails are moveable, allowing the gun to be in towed...

or deployed position.


The Bullock cannons came as an unassembled kit, to be put together by the lucky kid who got one as a holiday present from Aunt Sophie and Uncle Lou. The construction involves some very hefty screws, nuts, and bolts.

Whether or not this Japanese copy was intended to be a put-together kit is unknown to me.
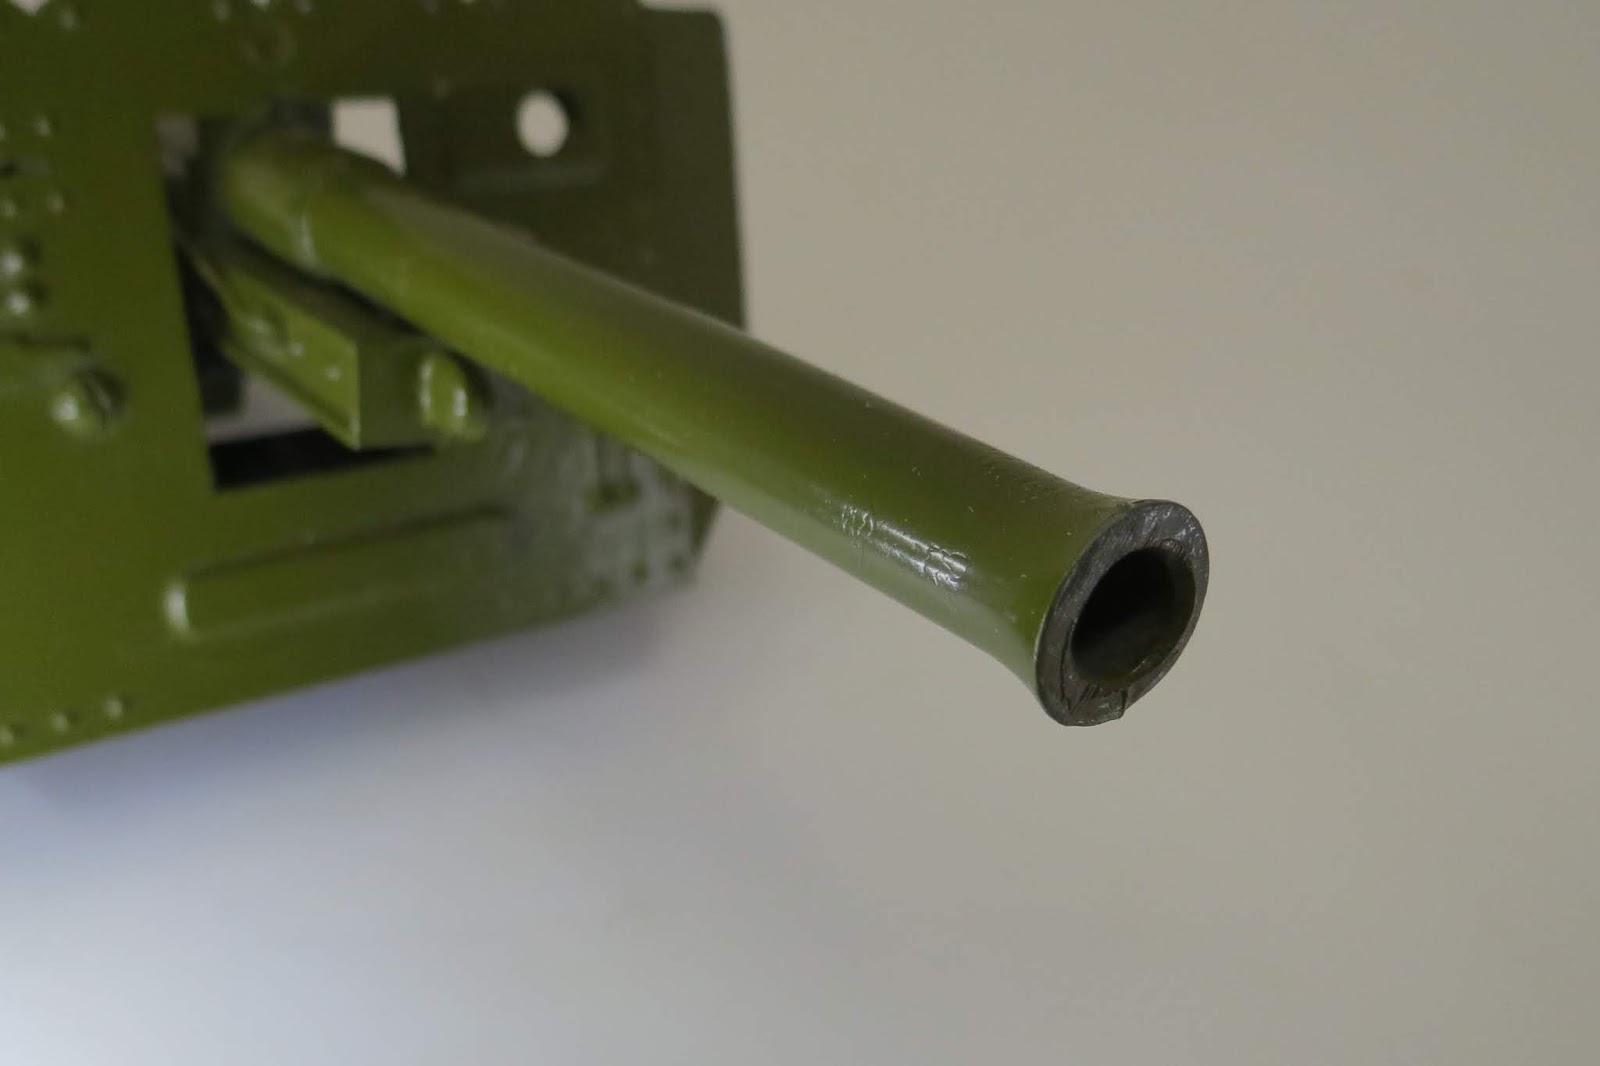
I like the look of the flared muzzle

The elevation mechanism includes a knurled brass nut on a threaded shaft

The range of elevation is modest, typical for a flat-trajectory weapon like an anti tank gun.
.


A robust towing ring locks the trails in the towing position.


The leaf-spring firing mechanism is pretty elegant in its simplicity.

The hammer-wire is drawn rearward until it locks into the cocked position.

The projectile is placed into the breach...


and the beaded lanyard is pulled, releasing the mainspring and sending the projectile downrange.
 The test-firing achieved a very respectable 26 feet six inches.


Back in the day cheap knockoffs were made in postwar Japan rather than Red China. You just can't beat the low overhead of using slave labor. You may like to read this on that subject.

The gun is an odd scale; too large for a 60mm soldier, but just about right for a five inch soldier. None of the four Premier's guns I own are of a common scale one to the other.

The box art depicts something more like a 20mm antiaircraft gun.


Premier's 25-pounder is on the left and the anti-tank gun is on the right. The only components that they share are the wheels and the breech mechanism, otherwise they are very different from each other.

Until next time...
Soldier on!
Mannie


