Recently I posted about how I made my 54mm cornstalks...which you can see here.
I was intending to make a twelve-inch square cornfield on four bases, but as I was coming down the homestretch I realized that I wouldn't have enough twist-ties to complete the last square. I needed 24 stalks, I had 14.
In the 19th century is was a common practice to share the ground between corn and pumpkins - one grows high and the other grows low. So I embarked upon making a nice pumpkin vine to make up for the shortfall in cornstalks.
Out came the wire strippers and a six-inch length of speaker wire.
After much twisting...
the copper vine was complete.
I've been working with Sculpey for years; it's a polyform plastic clay that you bake into permanence. It's really fun to work with. I used Sculpey to make the pumpkins, and with a toothpick I made the characteristic ridges of a pumpkin.
I plugged the unbaked pumpkins into the stalks that were waiting for them on the copper vine and put them in a 275-degree oven for 20 minutes.
With pumpkins firmly attached, I started painting the vine...
and the pumpkins.
Then I laid out lots of leaves to cut out and paint. Fortunately, I have a pumpkin vine growing from my brushpile right now, so I had a ready reference nearby.
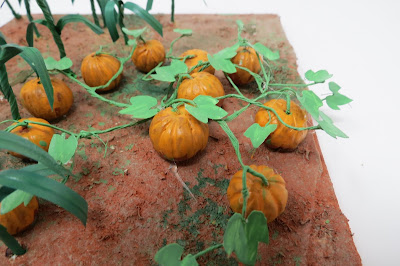
I hot glued the leaves on to the vine and attached the vine and pumpkins to the base, also anchoring the pumpkins with hot glue. At that point I painted the leaves.
The result is a very satisfying pumpkin vine ripening in the red soil and bright sun of a western Maryland cornfield.
Pumpkin pie anyone? I'll save you a slice. Until then...
Soldier on!
Mannie


1 comment:
Excellent work! I bought a pack of the JTT(?) ready made cornstalks, they are nice, but too expensive here in the UK for the amount i need - so i am definitely going to try your method. Thanks for the inspiration.
Post a Comment